Chosen theme: Simple Guide to Fixing Car Scratches. Welcome! Today we turn small scars into success stories with clear, practical steps you can follow at home. Whether it’s a grocery-cart scuff or a deeper scrape, you’ll learn what to do, why it works, and how to avoid making things worse. Share your scratch story in the comments and subscribe for future hands-on guides.
The Fingernail Test, Made Easy
Gently run a clean fingernail across the scratch. If it catches, you likely have a deeper mark through the clearcoat; if not, it may be a superficial scuff. This fast check helps you choose between polishing, touch-up paint, or professional help. Post your results below and we’ll help you decide the next step.
Light, Medium, and Deep: What That Really Means
Light scratches live in the clearcoat, medium scratches touch color, and deep ones expose primer or even bare metal. Recognizing these layers prevents unnecessary sanding and preserves your car’s finish. Snap a close-up photo in daylight, describe the color you see, and ask the community for a second opinion.
A Real Curb-Kiss Story
When Maya brushed a low curb, the gray line looked terrifying. A closer look revealed only clearcoat transfer from concrete. A quick compound-and-polish removed it completely. Share your own before-and-after moments—your experience might save another reader hours of worry and guesswork.
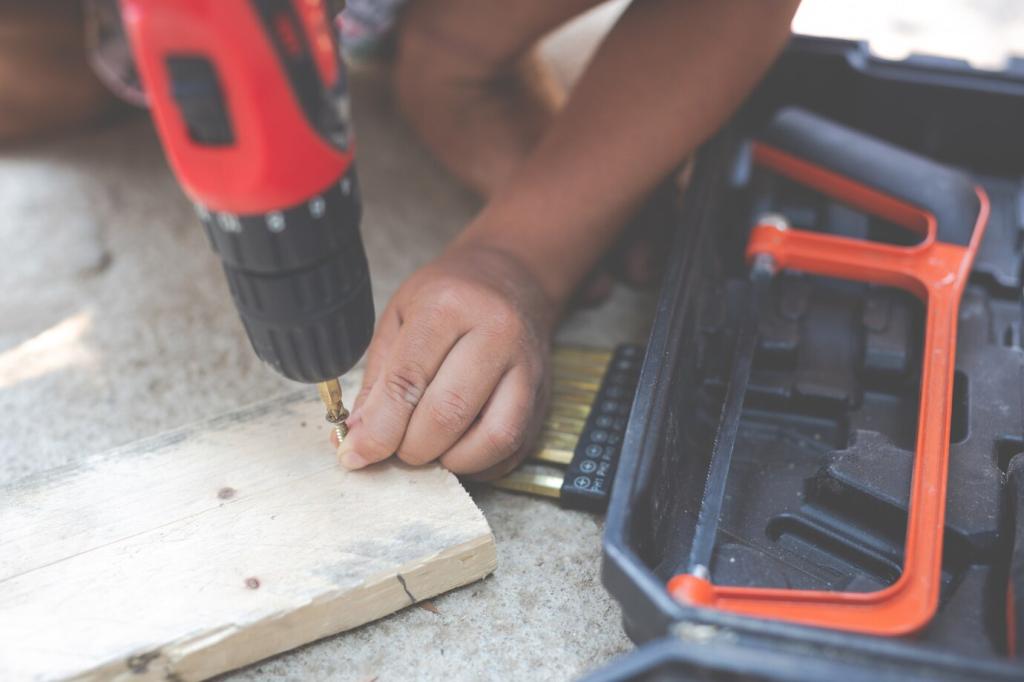
Choose a tiny section of the scratch and apply a pea-sized dot of compound to a soft pad. Work in gentle, overlapping passes using low pressure. Check after a few seconds. If the mark fades, continue with confidence. Share your test spot results—photos help us guide your next move.
Fixing Clearcoat Scratches the Simple Way
Divide the scratch into manageable segments. Wipe with a clean microfiber between passes and step into different lighting angles to confirm progress. Frequent checks prevent over-thinning the clearcoat and keep the finish uniform. Comment with your lighting setup for personalized inspection tips.
Locate the paint code on your door jamb sticker or owner’s manual, then match it through your dealership or a reputable supplier. Accurate color avoids uneven patches. Drop your make, model, and year below, and we’ll help you find the exact code location.
Use primer only if bare metal is visible. Apply very thin, controlled layers of base color with a fine brush or pen, allowing proper dry time. Cap with clearcoat for depth and protection. Ask about drying intervals for your climate to keep results clean.
Once fully cured, level the area lightly with very fine wet sandpaper and lots of lubrication, then polish to restore gloss. Gentle, patient strokes are key. Share your progress and any haze you see—we’ll suggest polishing steps to recover clarity safely.
Wash Smart, Dry Smarter
Use the two-bucket method, fresh mitts, and gentle soaps. Rinse thoroughly and dry with clean, plush towels to minimize contact. These habits stop tiny swirls from becoming visible scratches. Comment with your wash routine and we’ll suggest simple upgrades.
Park away from shopping carts, give door gaps breathing room, and consider door-edge guards. Keep a quick-detailer and microfiber in your trunk for bird drops or sap. Share your parking challenges, and the community will help brainstorm safer spots.